Device Registration (Android)
The first time you open AndroMate, the app prepares the phone and then connects it to your project. This page walks through everything you will see on the phone, in order, so you can finish the setup without guessing.
Supported phones
Currently, AndroMate supports Samsung phones only. We are adapting the app to other brands, with priority to Xiaomi (HyperOS) and Google Pixel (native Android).
The whole flow has four stages:
| Stage | What happens | Where |
|---|---|---|
| 1. Consent | You read and accept the management disclosure | Dialog on the phone |
| 2. Special permissions | You enable the system settings AndroMate needs | Android Settings, one screen at a time |
| 3. App permissions | You allow notifications, location, SMS, Bluetooth, camera... | Standard Android pop-ups |
| 4. Sign in | You scan a QR code from the web portal (or sign in with your account) | AndroMate login screen |
While stages 1 to 3 run, AndroMate shows a progress bar with the current step: User consent, Init apk, Check screen automator permission, Check device permission, Check app permission, Check connection, Init Job Files dir in Sd Card, Check auth, then Finish.
Before you start
- The AndroMate app is installed on the phone.
- You have an AndroMate account with a project on the web portal.
- The phone has an internet connection.
- You have access to the web portal on another screen, to generate the QR code (covered in Stage 4 below).
Stage 1 - Consent
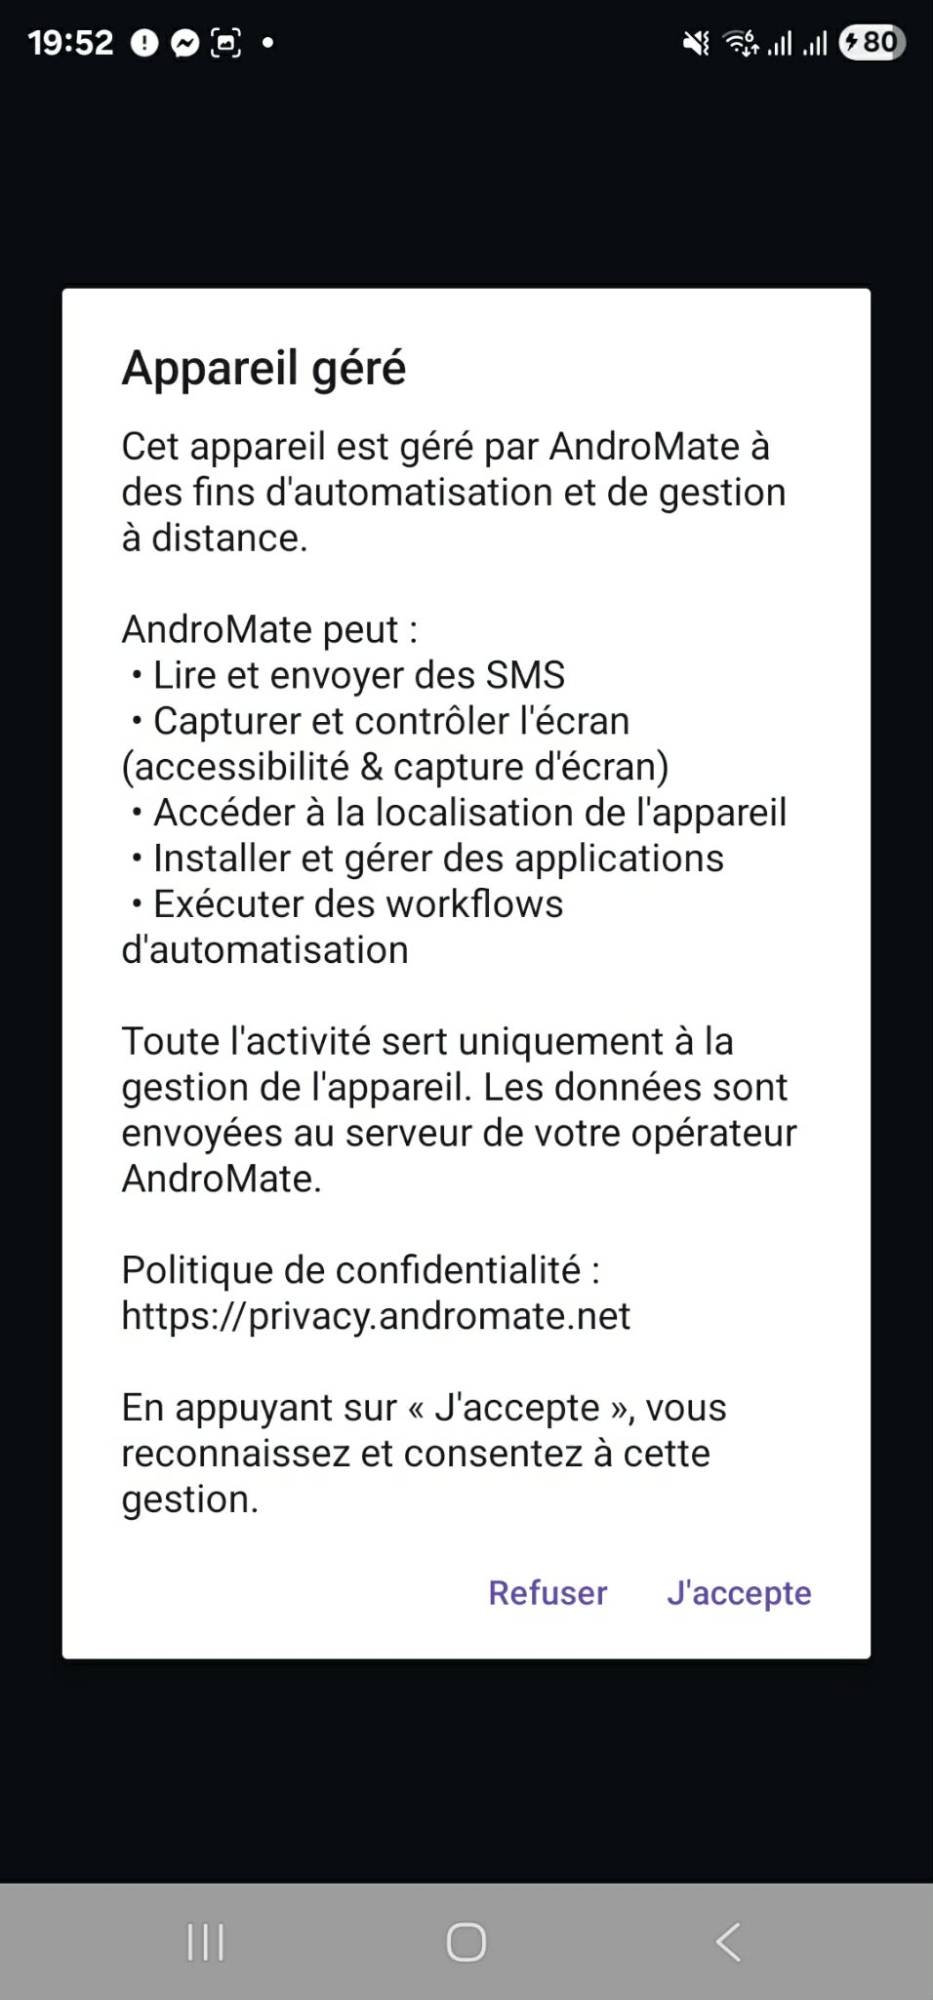
At the very first launch, AndroMate shows a Managed device dialog. It explains what AndroMate can do on the phone: read and send SMS messages, capture and control the screen (accessibility and screen capture), access the location, install and manage applications, and run automation workflows. It also links to the privacy policy at https://privacy.andromate.net.
- Tap I agree to continue. The app remembers your consent and does not ask again for this version of the disclosure.
- Tap Decline and AndroMate closes: it cannot work without your consent.
The dialog follows the phone's language: on a phone set to French it reads Appareil géré, J'accepte and Refuser.
Stage 2 - Special permissions
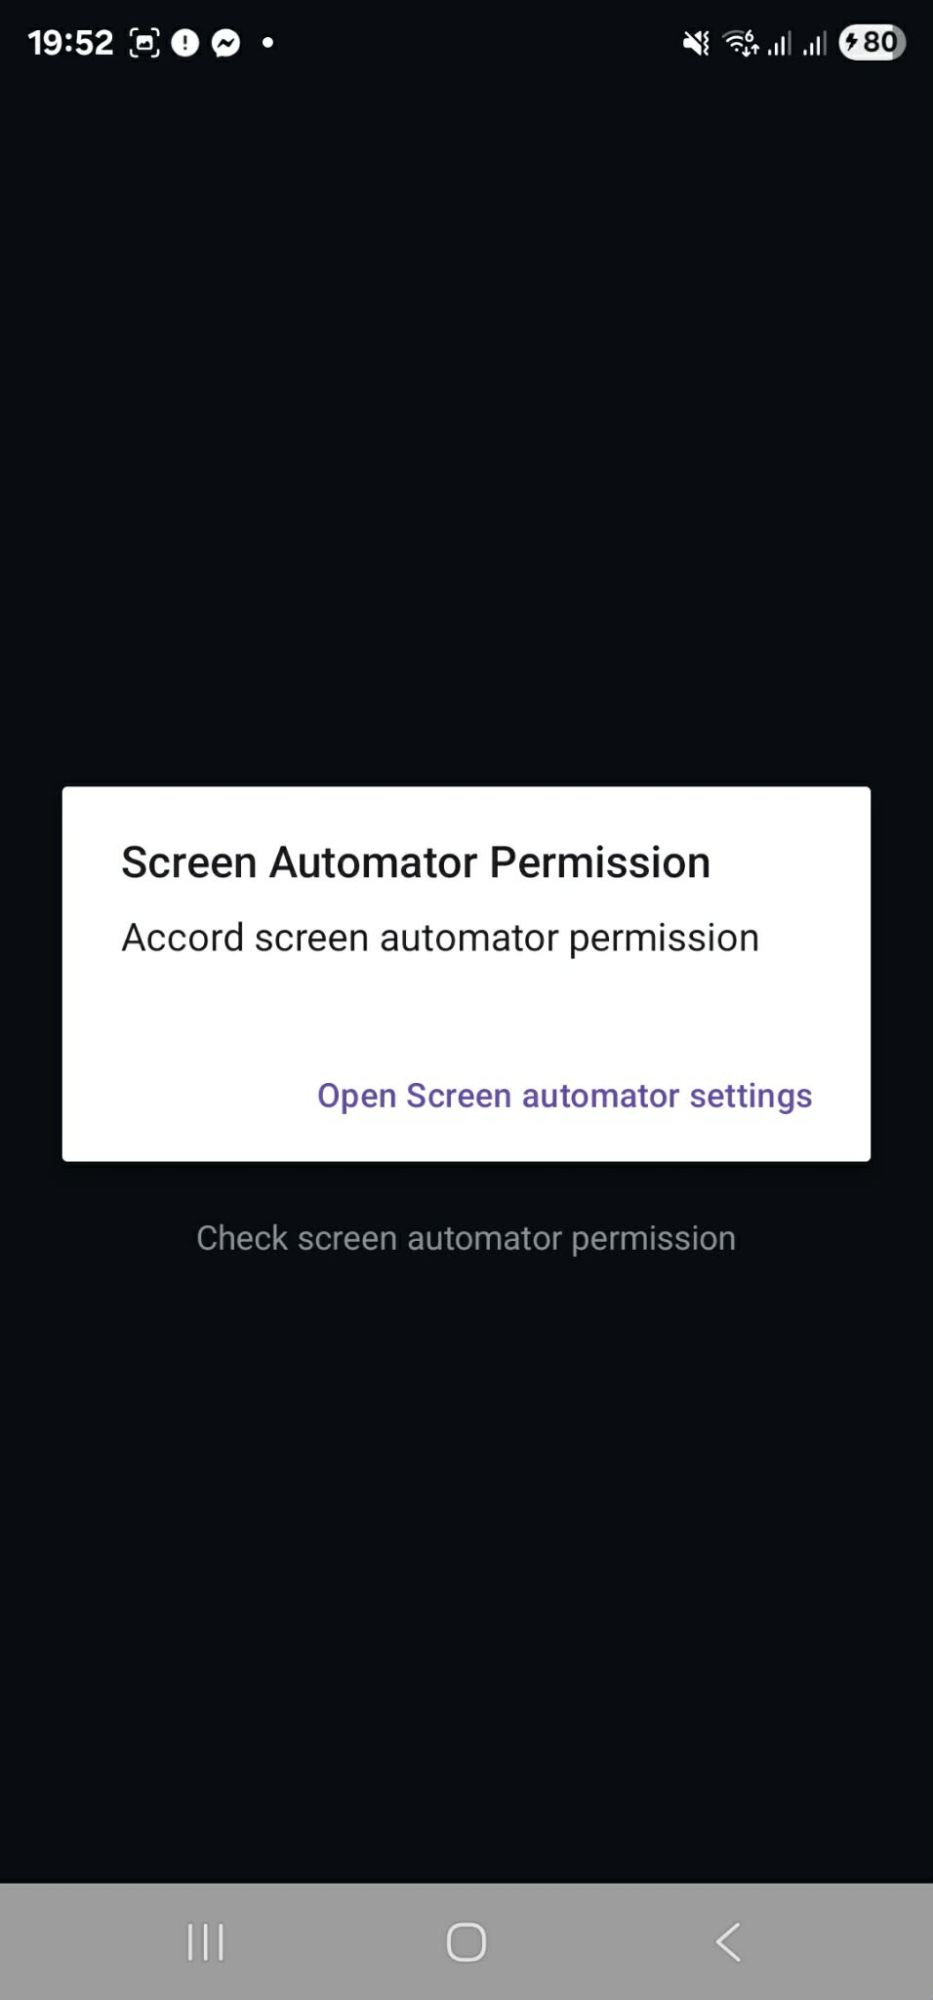
AndroMate then checks six system settings, one after the other. For each one that is not yet enabled, a dialog appears with a button that opens the matching Android settings screen. The dialog cannot be dismissed and stays on screen until the permission is granted, so you always know what is missing. Permissions that are already granted are skipped.
| Dialog title | Button | What to do in Android Settings | Why AndroMate needs it |
|---|---|---|---|
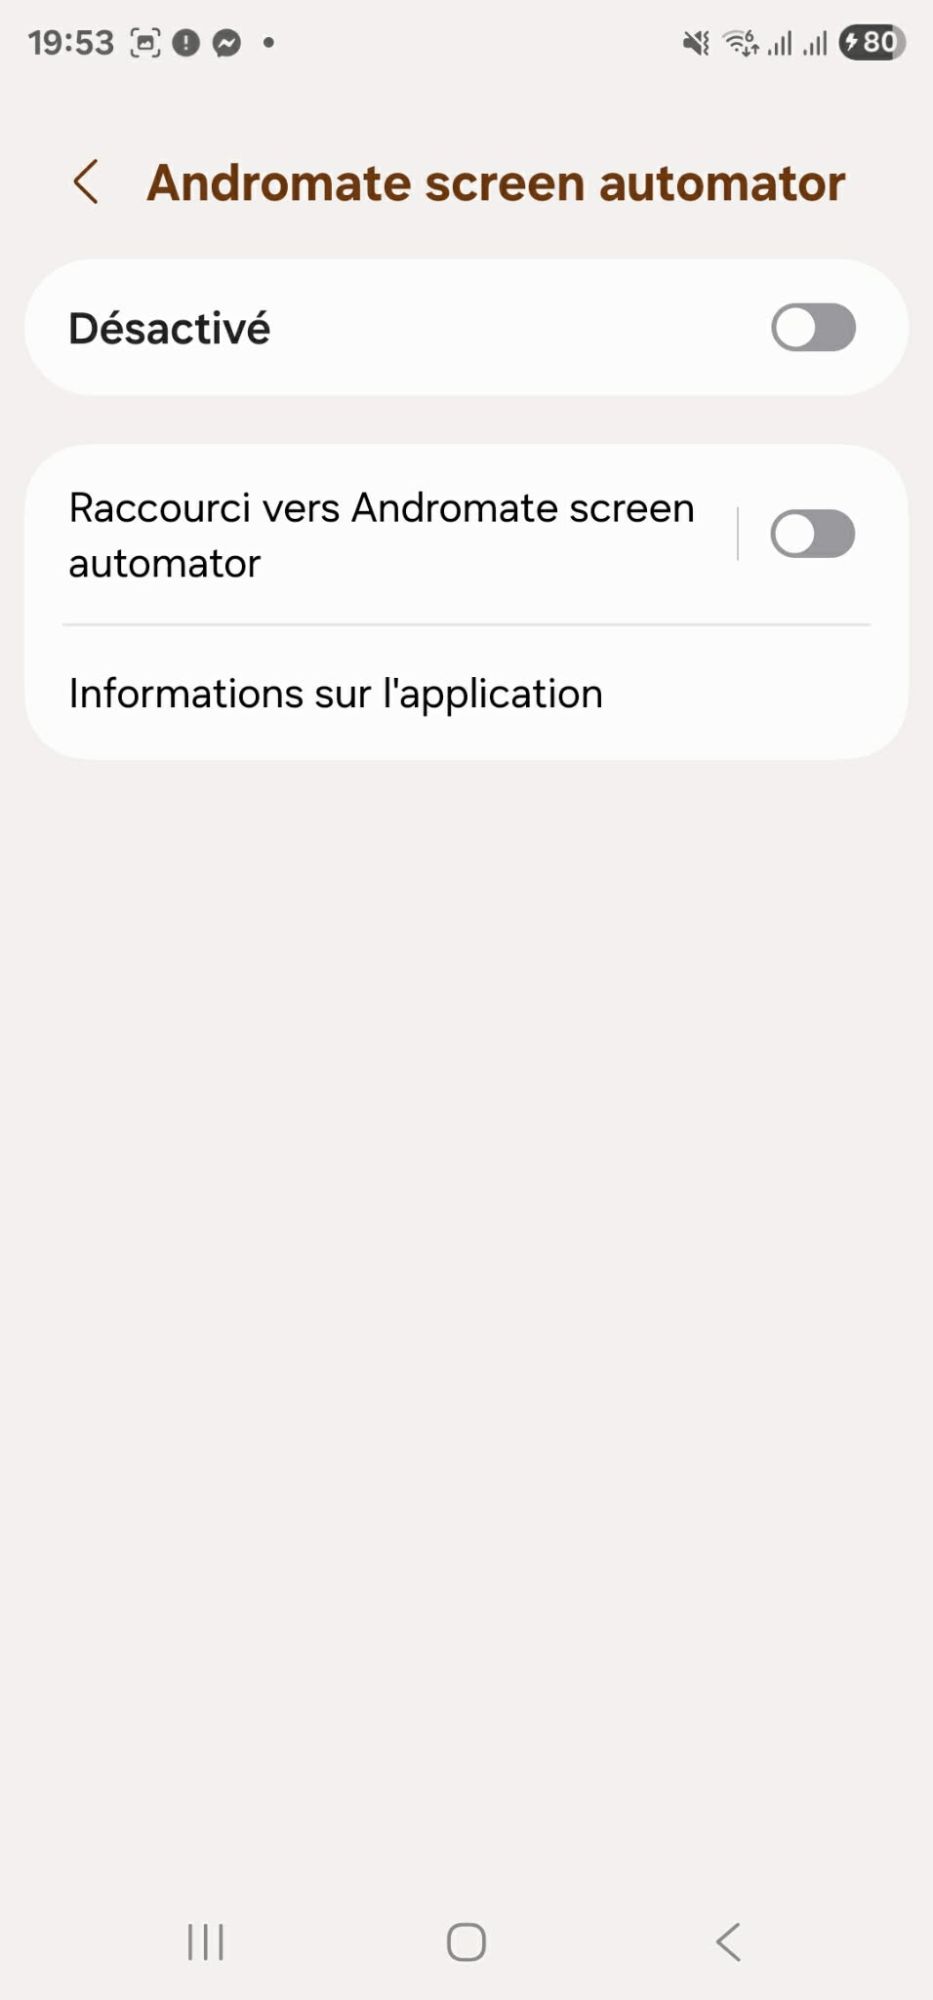
| Screen Automator Permission | Open Screen automator settings | Find AndroMate in the Accessibility list, turn it on and confirm | Lets workflows tap, swipe and read the screen |
| First Plan Permission | Open overlay settings | Turn on Allow display over other apps for AndroMate | Lets AndroMate work in the foreground while other apps are open |
| Battery Optimization | Disable battery optimization | Choose Allow when Android asks to let AndroMate run without restrictions | Keeps workflows running reliably in the background |
| Device Admin Permission | Activate device admin | Tap Activate this device admin app | Lets AndroMate manage automation-related device settings |
| All Files Access | Open all files access settings | Turn on Allow access to manage all files | Lets workflows read and write files |
| Install Unknown Apps | Open install permission settings | Turn on Allow from this source | Lets AndroMate install app updates during device management |
The first dialog is Screen Automator Permission. Its button opens the AndroMate screen automator accessibility screen: turn the switch on and confirm. After you enable a setting, go back to AndroMate (Back button). The dialog closes on its own within a second and the next one appears.
Device Owner phones
On a phone installed as Device Owner, the device administrator permission is already active, so that dialog is skipped.
Stage 3 - App permissions
Next, Android shows its standard permission pop-ups for whatever is still missing. Allow them all so that every task works:
| Permission | Used for |
|---|---|
| Notifications | The status notification of the background service |
| Phone state | Reading device information |
| Location (approximate and precise) | Location and speed tasks, Bluetooth scanning |
| SMS (send, read, receive) | SMS tasks |
| Photos, music and video | File and media access |
| Nearby devices (Bluetooth scan and connect) | Bluetooth tasks |
| Camera | Scanning the registration QR code |
If you refuse a permission, the tasks that depend on it will fail later with a permission error. You can grant it again from Settings -> Apps -> AndroMate -> Permissions.
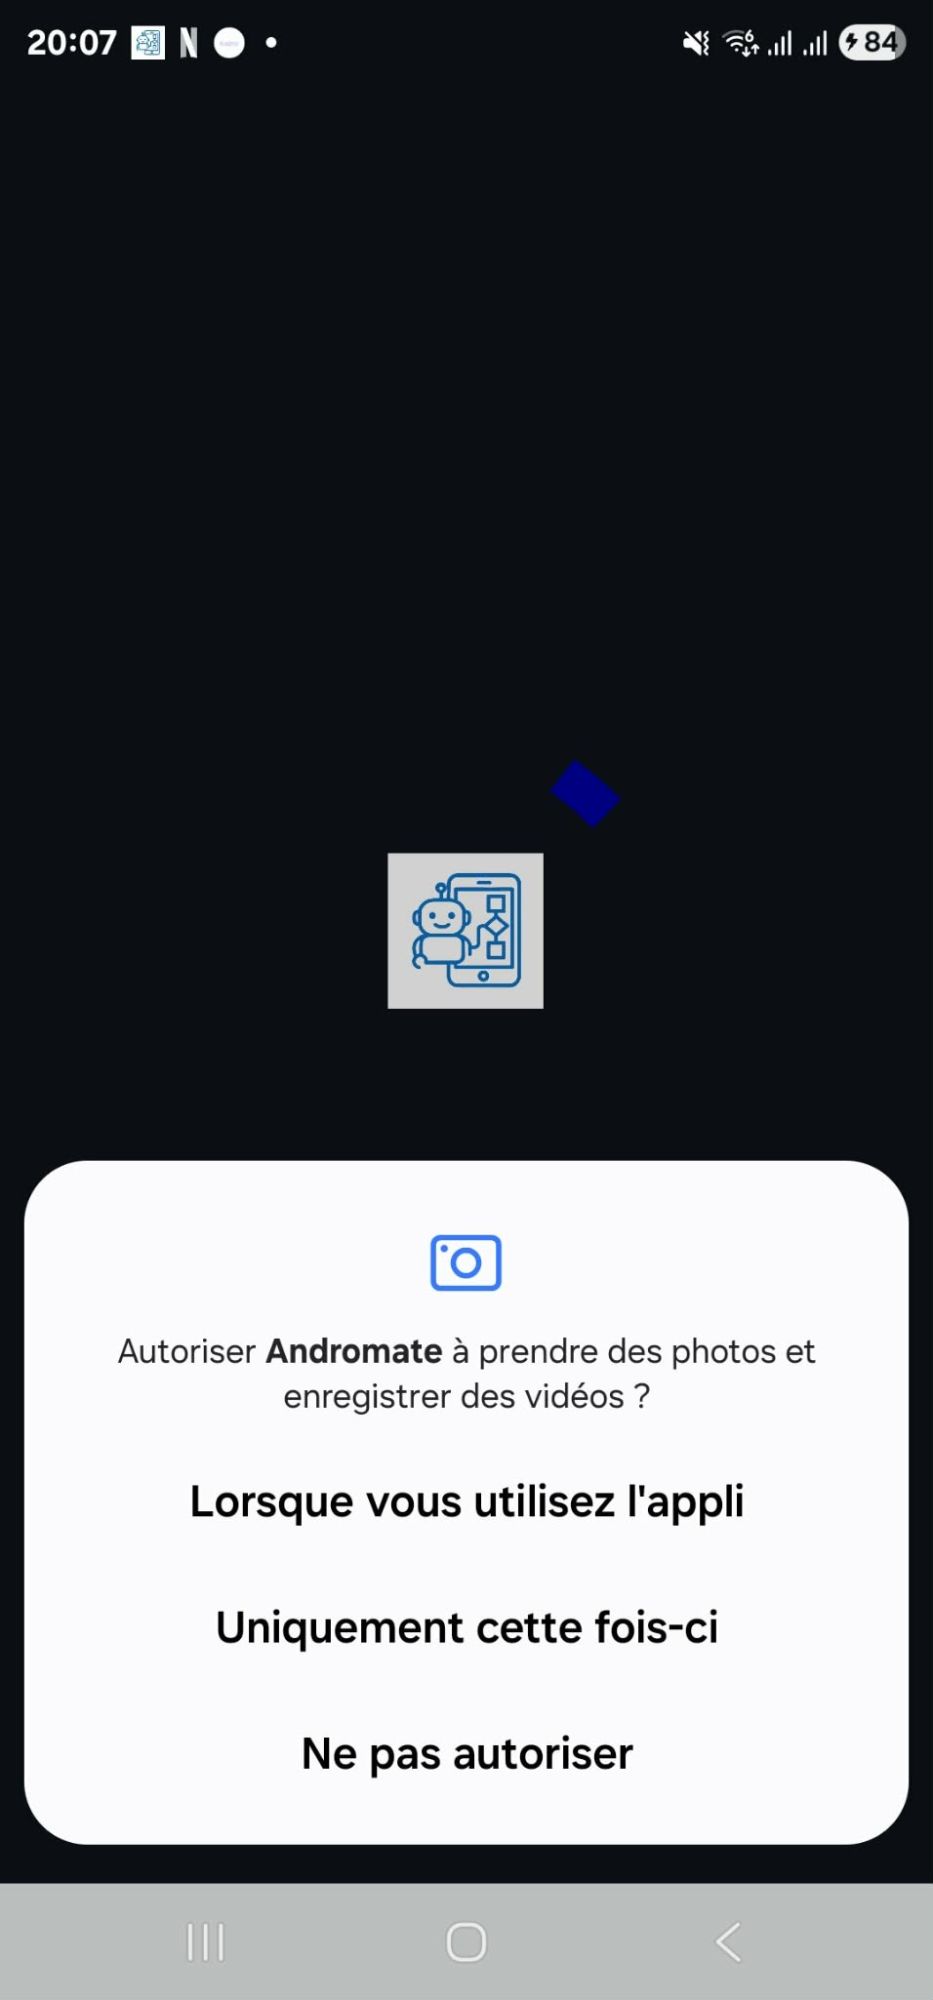
For each pop-up, choose the option that keeps the permission (for example While using the app), not Don't allow.
Stage 4 - Sign in and register the device
When the progress bar reaches Finish, AndroMate opens the login screen (or goes straight to the main screen if the phone is already signed in). You have two ways to connect:
Option A - Scan a QR code (recommended)
This registers the phone in your project without typing any username or password.
-
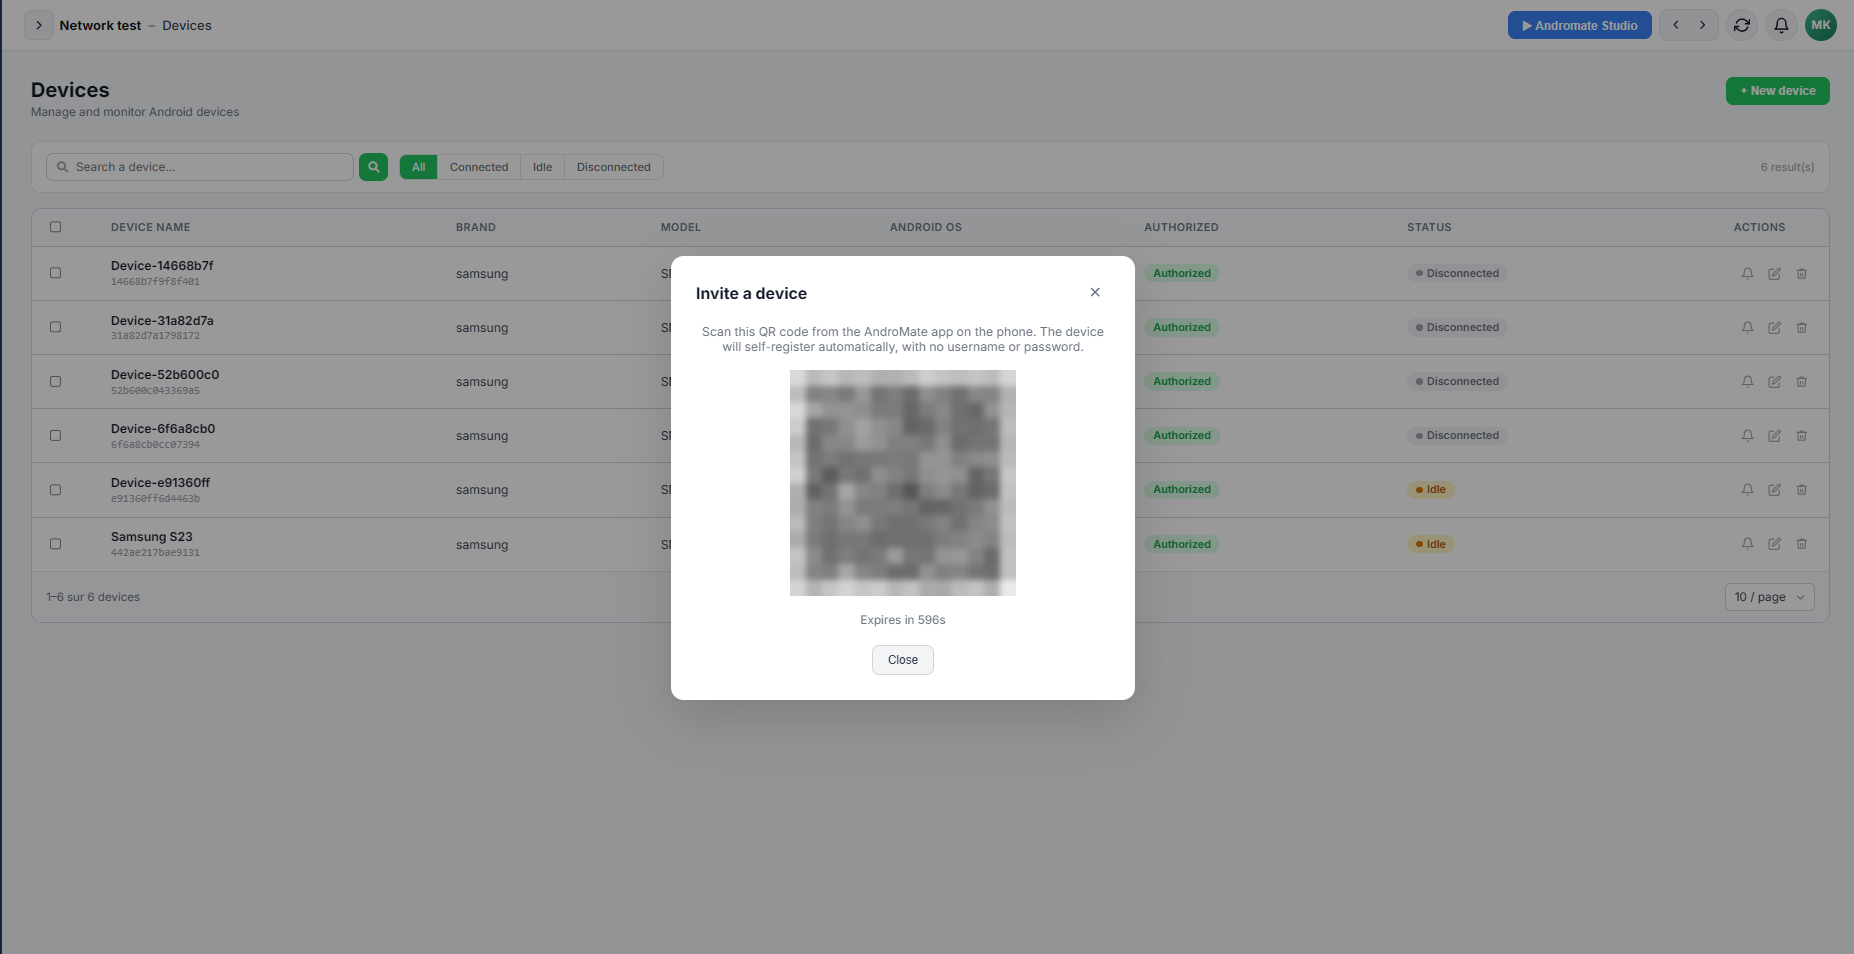
In the web portal, open Devices and click + New device. The Invite a device window shows a QR code and a countdown (Expires in ...s).
-
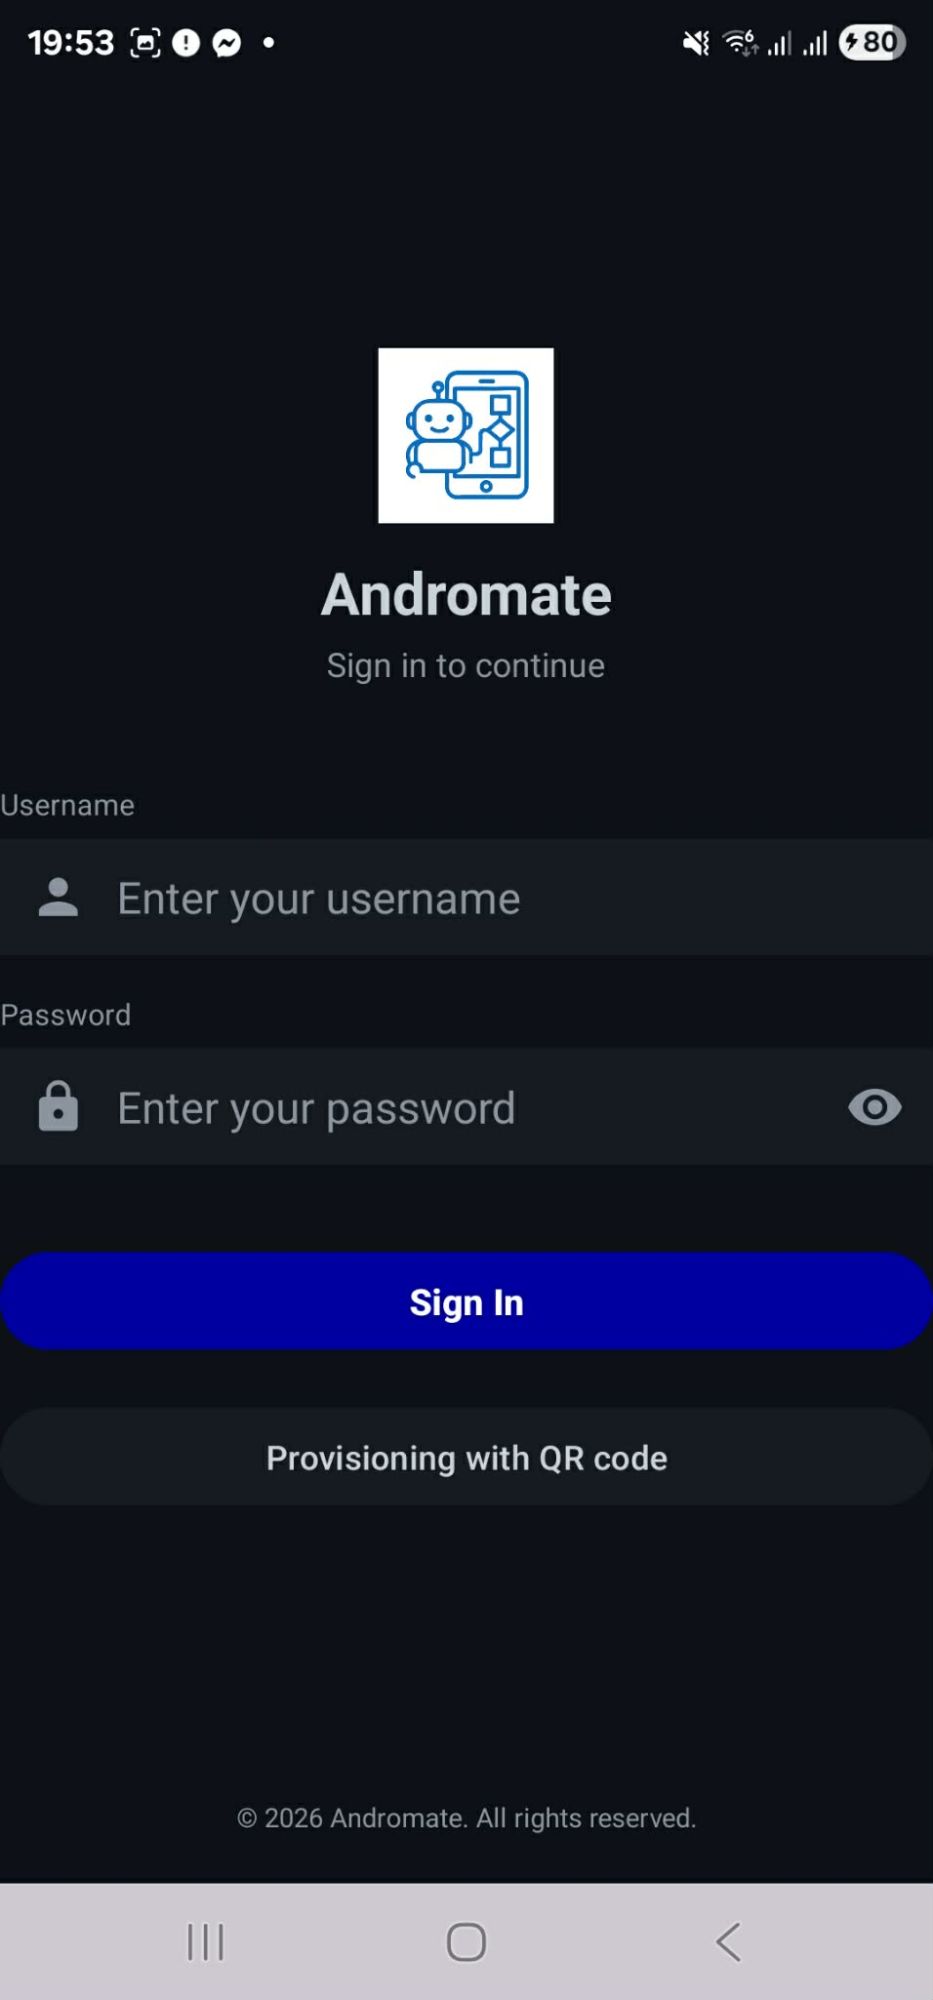
On the phone, tap Provisioning with QR code on the login screen and allow camera access if asked.
- Point the camera at the QR code.
- AndroMate signs in, registers the phone as a device of your project, starts its background service and opens the main screen.
If the code expires before you scan it, click Generate a new QR code in the portal and scan the new one.
Option B - Sign in with your account
Enter your username and password on the login screen and tap Sign In. If a field is empty, the app shows Username and password are required.
The phone appears in your devices
Once the scan succeeds there is nothing else to do: the phone is added to the Devices list automatically and its background service starts.
-
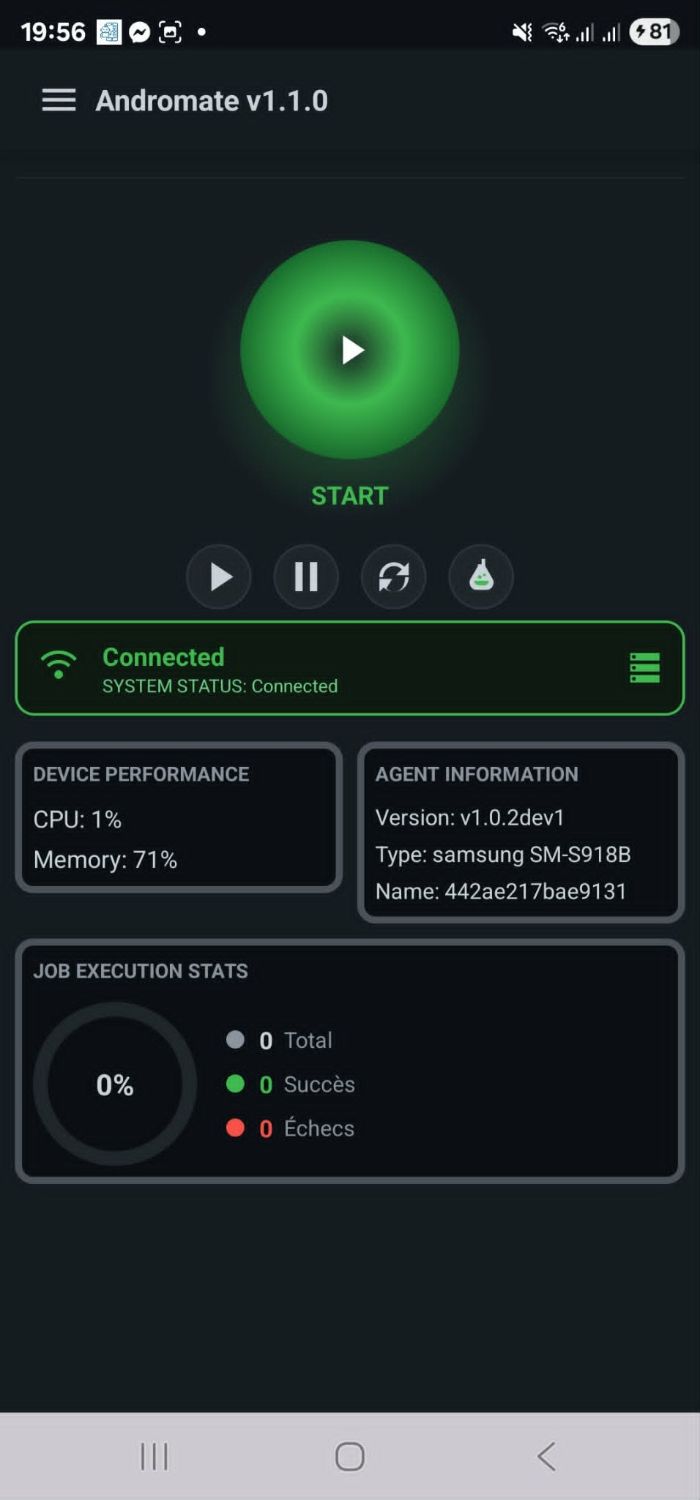
On the phone, the AndroMate main screen opens with the status Connected (SYSTEM STATUS: Connected). It also shows the START and pause controls, the device performance (CPU and memory), the agent information (version, model, device name) and the job execution statistics.
-
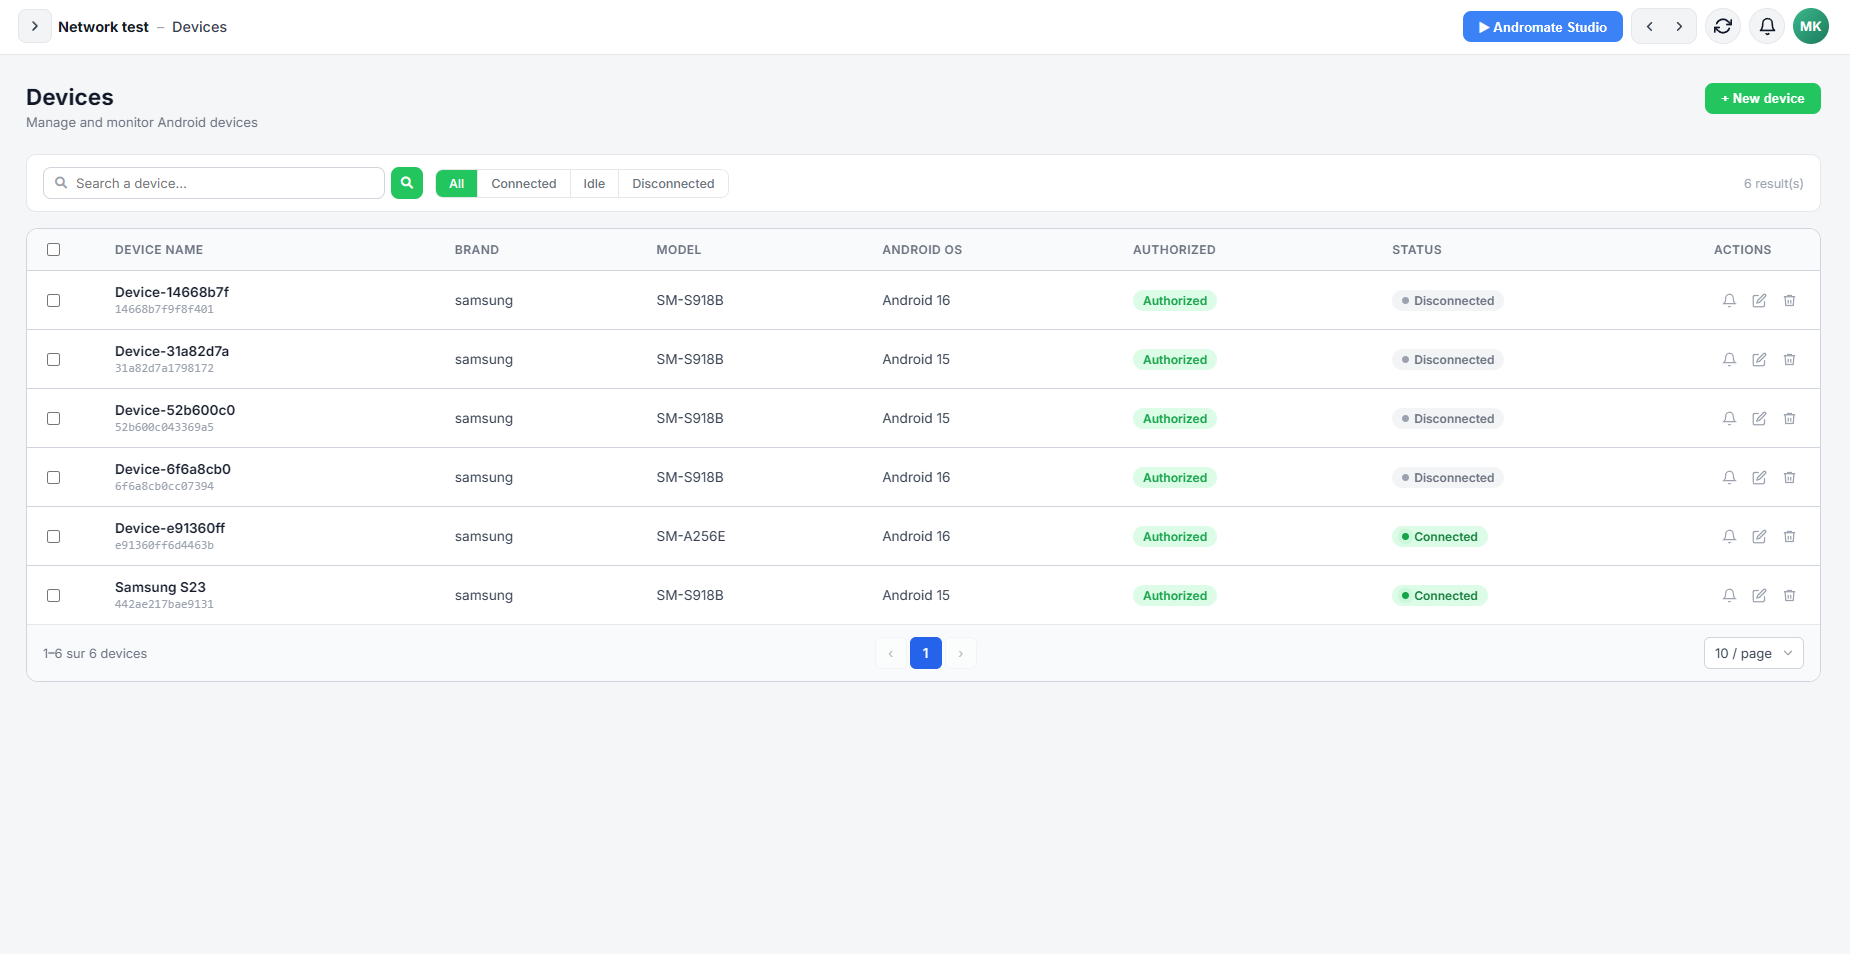
In the web portal, open Devices: the phone is in the list with its brand, model and Android version, marked Authorized, with the status Connected (or Idle when it is connected but not running anything). Refresh the page if it is not there yet.
Troubleshooting
| Message or symptom | Cause | What to do |
|---|---|---|
| The app closes right after the first dialog | You tapped Decline on the consent | Reopen AndroMate and tap I agree |
| The same permission dialog keeps coming back | The setting is still off | Open the settings from the dialog, enable it, then go back |
| The QR scan does not start | Camera permission refused | Allow Camera in Settings -> Apps -> AndroMate -> Permissions |
Enrollment failed: ... |
The QR code expired or is not valid, or the network is down | Generate a new QR code in the portal and scan it again; check the internet connection |
Invalid username or password |
Wrong credentials | Check them and try again |
Network error, check your connection |
No internet, or the server is unreachable | Check Wi-Fi or mobile data and retry |
| The phone is not in the Devices list | The registration did not complete, or the list is not refreshed | Refresh the page; if it is still missing, repeat the QR scan |
What's next
- Launch your first job
- Keeping the app running day and night: battery and background settings (coming soon)